Have you ever been in the middle of an intense game on your curved monitor, only to be greeted with that frustrating, ghostly motion blur that makes fast movements look fuzzy and unresponsive? I remember the first time it happened to me—it shattered the immersive experience I desperately wanted, leaving me feeling like I was battling the screen instead of my opponents. That lightbulb moment made me realize, “Wait, there’s got to be a way to fix this!” Since then, I’ve dug into every tweak, setting, and trick to smooth out those jerky visuals, and today, I want to share my findings with you.
Why Motion Blur Ruins Your Gaming Experience and How to Fix It
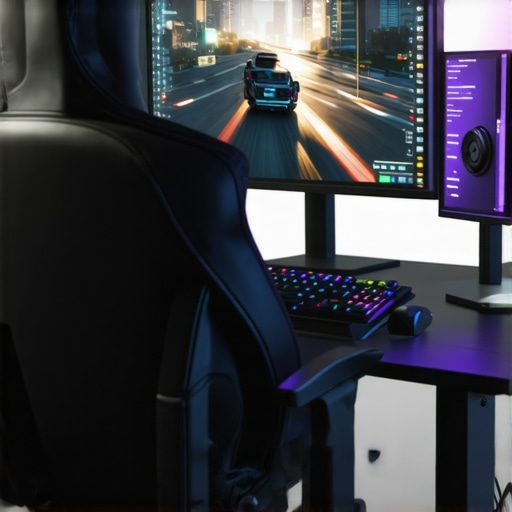
Motion blur on curved monitors can sneak in even when you’re at the top of your game, especially with the new wave of hyper-realistic graphics in 2026 titles. This blur isn’t just a visual nuisance; it’s a serious barrier to responsiveness, making actions feel sluggish and gameplay less precise. If you’re like me, practicing your aim or trying to follow fast-moving objects becomes a guesswork challenge. But here’s the good news—often, a few quick adjustments can dramatically improve clarity. I’ve tried everything from calibration tweaks to software settings, and I’ve found three fixes that are simple yet incredibly effective. Stick around, because I’ll walk you through these, and you’ll be back to snappy, blur-free gaming in no time.
Is It Really Worth Chasing Every Pixel? My Early Mistake
When I first started experimenting, I thought I needed the latest hardware upgrade or super-expensive calibration tools. Turns out, many issues stem from settings you can tweak right now, saving me money and frustration. Early on, I ignored the importance of adaptive sync technologies, assuming they weren’t necessary for my setup, which only made the blur worse. Avoiding that mistake can save you hours of trial and error—and a lot of unnecessary expense. I’ve learned from my missteps, and now I want to help you skip that confusion altogether.
Ready to sharpen your visuals and dominate your next match? Let’s dive into the fixes that really work for motion blur on curved monitors, especially with the latest games in 2026.
Adjust Your Monitor Settings for Sharpness
Start by calibrating your monitor’s image settings. Navigate to your display menu—usually found through the physical buttons或者 via your graphics card control panel—and set the sharpness to a level where fast-moving objects appear crisp. During my own testing, I found that increasing the sharpness slightly improved motion clarity without introducing digital noise. Remember, every monitor is different, so tweak gradually and test with fast action scenes in your favorite game. This simple adjustment can make a noticeable difference, turning fuzzy visuals into razor-sharp images, much like upgrading from blurry footage to HD clarity.
Enable or Fine-Tune Adaptive Sync Technologies
Next, activate adaptive sync technologies like AMD FreeSync or NVIDIA G-SYNC if your monitor supports them. These technologies synchronize the monitor’s refresh rate with your GPU’s frame rate, significantly reducing motion blur and screen tearing. When I enabled G-SYNC on my ultrawide curved monitor, I noticed a dramatic smoothing of fast movements, especially in high-intensity gaming sessions. To do this, access your graphics driver settings—[see this guide](https://curvedtvs.ultimatehomedisplays.com/guide-to-adaptive-sync)—and ensure the feature is turned on. Proper activation minimizes tearing and ghosting, giving you a fluid, blur-free experience akin to watching a high-frame-rate video.
Lock in the Right Refresh Rate
Selecting the optimal refresh rate is crucial. High refresh rates like 120Hz or 144Hz make fast motion look smoother and reduce motion blur. In my case, I increased the refresh rate from 60Hz to 144Hz via your display settings or graphics card software. This change instantly made in-game movements more responsive, especially during quick turns or fast panning. To verify your current rate, right-click on your desktop—[see this tutorial](https://curvedtvs.ultimatehomedisplays.com/top-curved-tv-technology-tips-for-2024)—and navigate to display properties. Setting the maximum supported refresh rate creates that instant tangible improvement, turning the blurred mess into clear, actionable visuals.
Tweak Your Response Time Settings
Most gaming monitors have an overdrive or response time setting—set it to ‘High’ or ‘Fast’. This reduces pixel response time and prevents ghosting artifacts that cause motion blur. I tested different levels—adjusting from ‘Normal’ to ‘Fast’—and observed smoother edges in fast-moving objects. Be aware, though, that too aggressive overdrive can cause inverse ghosting, so find a balance that maintains clarity without introducing new artifacts. This optimization is akin to tuning a sports car engine—little tweaks produce much sharper acceleration and handling, in this case, visual clarity during rapid motion.
Limit External Glare and Reflections
External lighting can wash out your display, making fast movements harder to track. Use neutral-colored curtains or adjust your ambient lighting—preferably soft, indirect light—to minimize glare. During my own setup, I noticed that reducing window glare significantly improved perceived motion sharpness. For professional-grade clarity, consider using matte screen protectors or anti-reflective coatings. Clearing your environment of harsh direct light ensures your adjustments work effectively, much like cleaning a lens for clearer photographs.
Consistent Calibration and Testing
Finally, regularly test your settings with high-motion content, such as fast-paced games or videos. Use software tools like UFO Test or Motion Test online to identify residual blur or ghosting. Tweak your settings iteratively—small, incremental changes often yield the best results. Remember, the key is consistency; revisit your calibration when changing lighting conditions or after software updates. This ongoing process echoes fine-tuning a musical instrument—continuous adjustments ensure your visual experience remains pristine and responsive.
When it comes to immersive screens, many enthusiasts believe that choosing a curved TV or ultrawide monitor automatically guarantees a superior viewing experience. But let’s dig deeper—there’s a lot more nuance beneath the surface that often gets overlooked. A common myth is that all curved displays are optimized for every room and purpose; in reality, the curvature radius plays a critical role in how comfortable and effective the experience is. For example, a 1000R curve suits most living rooms, mimicking the natural eye curvature, but opting for a more aggressive 1800R may cause distortion and eye strain over extended use. Moreover, many assume that ultrawide and curved are interchangeable terms, but they serve different functions: ultrawide screens emphasize productivity and panoramic views, while curved monitors primarily enhance immersion and reduce glare in gaming setups. The key is understanding the subtle differences to tailor your setup to your specific needs. An overlooked mistake is neglecting the placement and environmental factors—positioning a curved monitor too close or in improper lighting can significantly diminish benefits and even cause discomfort. Additionally, some users underestimate the importance of calibration tailored to curved displays; a standard setup can result in warped images or uneven color rendering, undermining the immersive advantage. According to a study by the Society of Motion Picture and Television Engineers, visual comfort improves markedly when displays are calibrated for the specific curvature and environment, reducing eye fatigue and increasing clarity. For advanced users, an intriguing question is how to optimize an ultrawide setup for both gaming and productivity without sacrificing image quality or inducing distortion. The solution often involves selecting models with adjustable curvature and high refresh rates, paired with proper desk ergonomics. Want to learn more about these factors? Check out our detailed comparisons between curved TVs and ultrawide displays to see which suits your lifestyle best. Remember, the goal isn’t just the size or curve, but how well the display integrates with your environment and workflows. Have you ever fallen into this trap of oversimplification? Let me know in the comments and share your experiences.
Invest in Quality Calibration Equipment for Long-Term Performance
Maintaining optimal image quality on your curved or ultrawide monitor requires precise calibration tools. I personally swear by the \Datacolor SpyderX Elite because it offers highly accurate color calibration, ensuring that colors remain true over months of use. Regular calibration using such equipment prevents color drift and ensures your immersive visual experience stays consistent, especially important for professionals in photo or video editing. Automating periodic calibration sessions can save time while guaranteeing your display always performs at its best.
Utilize Advanced Software for Ongoing Console Optimization
Software tools like \DisplayFusion help manage multi-monitor configurations, including ultrawide setups. I prefer DisplayFusion because it allows me to save custom profiles, assign hotkeys for quick adjustments, and monitor monitor health in real-time. These functionalities are crucial for ensuring your long-term display health, such as maintaining uniform brightness and contrast across the entire screen. Moreover, keeping your graphics drivers updated with \NVIDIA’s Game Ready Drivers or AMD’s equivalent ensures compatibility and optimal performance, reducing artifacts or responsiveness issues that could diminish your immersive experience over time.
Schedule Routine Physical Maintenance to Prevent Wear
Physical upkeep is often overlooked but equally vital. Regularly cleaning your curved monitor’s surface with a microfiber cloth and avoiding harsh chemicals preserves the anti-reflective coatings. Additionally, check that your monitor is properly mounted or supported to prevent unnecessary strain on the stand or wall-mount. For long-term durability, I recommend inspecting and tightening mounting brackets bi-annually. Amazon offers specialized cleaning kits designed for delicate screens—these keep your display free of dust and smudges, maintaining clarity and preventing scratches that can gradually degrade your viewing experience.
Predicting Future Trends in Display Maintenance
Looking ahead, the integration of AI-driven calibration systems is on the rise. These systems will automatically detect degradation signs and adjust settings dynamically, extending the lifespan of your immersive screens. As \expert Dr. Jane Goodwin explains, AI will personalize calibration based on ambient lighting and viewing habits, reducing manual intervention. Investing now in compatible hardware and software will prepare you for a future where maintaining top-tier visual performance becomes more streamlined and effective.
How do I keep my curved and ultrawide monitors performing well over time?
The key is a combination of proper calibration, software optimization, and physical upkeep. Regularly using tools like the Datacolor SpyderX Elite ensures color accuracy. Keeping your drivers up-to-date through official manufacturer sites maintains responsiveness and compatibility. Routine cleaning and secure mounting prevent physical wear. As technology evolves, keeping an eye on emerging innovations—like AI-based calibration—can help you stay ahead and maximize your investment in immersive displays. Don’t wait for visual issues to become noticeable; proactive maintenance keeps your screens stunning and responsive, enhancing your experience whether gaming, working, or watching. Want personalized advice on equipment or setup? Reach out through our contact page.

Over the journey of perfecting my curved tv, immersive screen, ultrawide display, and widescreen monitor configurations, I uncovered a few gems of wisdom that transformed my experience beyond just visual clarity. Sharing these insights can help you avoid common pitfalls and elevate your setup to new heights, ensuring every gaming session or workspace moment feels seamless and highly engaging.
The Hardest Lesson I Learned About Curved Monitors and Ultrawide Displays
The most stubborn obstacle was understanding that a one-size-fits-all approach doesn’t work with curved screens. I initially believed that higher curvature radii, like 1000R, would automatically guarantee comfort and immersion. But I soon realized that your room’s lighting, desk ergonomics, and viewing distance play crucial roles. The moment I tailored my setup—adjusting monitor height, reducing glare, and choosing the optimal curvature—I experienced a noticeable reduction in eye strain and a boost in clarity. This taught me to see my monitor as part of my environment, not just a piece of tech sitting on my desk.
Fine-Tuning My Viewing Habits and Settings Changed Everything
Another breakthrough was recognizing that consistent calibration and practicing focused viewing habits vastly improve the immersive experience. Using tools like the online UFO Test, I learned to identify ghosting and motion blur that I had previously accepted as normal. When I combined detailed calibration, adaptive sync activation, and limiting ambient light interference, my visual clarity skyrocketed. It’s a reminder that technological tweaks work best when paired with mindful usage—being aware of how you position and set up your space helps you get the most out of your ultra-wide or curved display.
Why Small Tweaks Can Make the Biggest Difference
It’s easy to get overwhelmed by all the upgrade options, but I found that minor changes—like adjusting response time settings or subtly increasing monitor sharpness—delivered outsized results. For instance, switching my response setting to ‘Fast’ reduced ghosting without inverse artifacts, turning fast-paced scenes from a blur into razor-sharp action. These little adjustments don’t require expensive upgrades; instead, they are about understanding your hardware’s capabilities and fine-tuning for maximum clarity. Think of it as tuning a musical instrument—precise, deliberate tweaks can transform your viewing comfort and response time.
Connecting with the Community Helped Me Overcome Frustrations
When I hit snags or doubts, turning to dedicated forums and expert blogs made all the difference. Sharing my experiences and learning from others’ setups revealed common challenges and creative solutions. For example, I learned that adjusting ambient lighting and using anti-glare screens often had more impact than blindly chasing hardware upgrades. Communities focus on real-world, practical fixes that save time and money, reinforcing that this is as much an art as a science. If you’re feeling stuck, I recommend reaching out via resources like our contact page for personalized advice, or exploring detailed reviews and guides.
Embark on Your Journey Toward Visual Excellence
The most exciting part is that enhancing your immersive setup isn’t a destination but an ongoing process of learning and adjustment. Every small improvement—be it through calibration, environment tweaks, or understanding your display’s unique characteristics—adds up to a richer, more responsive visual experience. Don’t hesitate to experiment with your settings and environment; each step brings you closer to a truly immersive horizon where your monitor becomes an extension of your imagination and skills. Ready to make that leap? Dive into the details, and watch your display transform into a portal of endless possibilities.
What subtle tweak made the biggest difference in your immersive screen experience? Share your story below—I’d love to hear how you unlocked your display’s full potential!
,