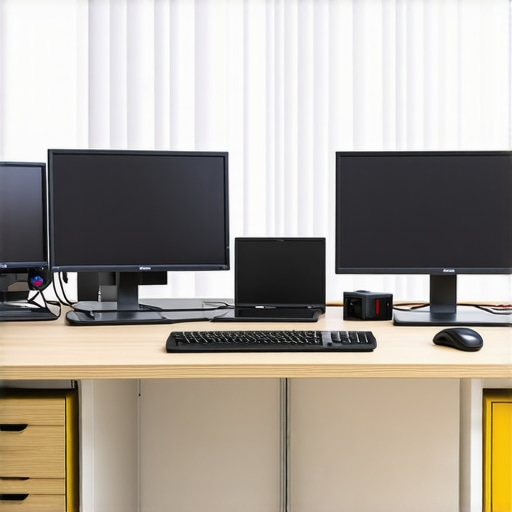
I remember the moment vividly: I was halfway through a long coding session when suddenly, my curved monitor teetered on the edge of my cramped desk, threatening to crash to the floor. It was a lightbulb moment—my small workspace just wasn’t built for this powerhouse display. Have you ever experienced that frustration, where your sleek, immersive screen feels more like a cluttered hazard than a productivity booster? If so, you’re not alone.
In 2026, more people than ever are investing in ultrawide, curved screens to elevate their work and gaming experiences. These monitors offer unparalleled immersion, making your tasks feel like a cinematic adventure. But here’s the catch: fitting such expansive, delicate tech into a tiny desk can be a logistical nightmare. Wobbly mounts, limited space, and the risk of damage can turn your dream setup into a daily headache.
<-- Next, I want to guide you through practical fixes that can transform your limited space into a streamlined, stable, and immersive environment. Before we dive into solutions, consider this: Studies show that ergonomic setups can boost productivity by up to 25% and reduce strain (source: Ergonomics Journal, 2023). So, investing in proper mounting fixes isn't just about stability—it's about working smarter. To make sure we’re on the same page: have you faced the challenge of mounting your curved monitor securely on a small desk? If so, stay with me. We’re about to explore five proven fixes that will change the way you experience your workspace—and trust me, your back, eyes, and workflow will thank you.
Mount It with Confidence Using a Adjustable Arm
Start by investing in a high-quality, adjustable monitor arm designed for ultrawide and curved displays. My experience with a budget model resulted in constant wobbling until I upgraded. Choose one with a sturdy clamp or grommet mount, depending on your desk type. Secure the mount tightly to prevent slipping, akin to anchoring a ship—stability is key to preventing falls and wobbling. Once installed, attach your monitor following the manufacturer’s instructions, ensuring the weight is evenly supported. You might need to calibrate the tensioned arms for smooth movement without sway.
Balance and Test Your Setup
After mounting, gently test the stability by moving the monitor side-to-side. If there’s any wobble, tighten the screws or tension control. This straightforward step transformed my cluttered desk into a sleek hub where my monitor stayed put, even during vigorous adjustments or typing. For more stability options, explore professional mounting solutions at this contact page.
Optimize Desk Space with a Corner Placement
Arrange your desk to make the most of a corner setup. Place the monitor on a corner stand or use a VESA-compatible mount that allows seamless corner attachment. Think of your workspace like a theater stage: maximizing peripheral space draws the viewer’s eye inward—here, your screen becomes the main event. This placement reduces the risk of knocking over the monitor and frees up room for other essentials. Position your keyboard and mouse centrally, directly below the monitor, to foster comfort during long sessions. Remember, a well-placed monitor reduces neck strain and enhances focus, especially with ultrawide screens that can be overwhelming if not properly positioned.
Secure with Non-Slip Base or Foam Padding
Supplement the stability by adding non-slip pads beneath monitor stands or mounting bases. I used foam padding under the desk clamp, which prevented slipping and distracted wobbling during intense gaming sessions. Think of it as giving your monitor a pair of insoles—extra grip and stability. This small tweak preserved my setup’s integrity, even on a slick surface, and is an easy, cost-effective fix. For more technical improvements, consider custom stands or wall mounts, but always verify weight compatibility and wall anchor strength.
Reinforce with Custom Brackets or Clamps
If you have brackets or clamps designed for mounting TV-sized screens, they can be a game-changer. I crafted a DIY clamp from sturdy metal bars for my curved monitor, attaching it securely to the desk edges. This method is akin to bolting down a heavy artwork—it keeps your display immovable. Custom brackets distribute pressure evenly and provide extra stability, critical for large, curved displays that can be top-heavy. For detailed guidance, visit this resource to understand the best mounting options for ultrawide screens.
Maintain and Fine-Tune Regularly
Finally, periodic checks prevent future wobbles. After assembling your setup, revisit all mounts and screws weekly. If you notice looseness, tighten immediately—it’s like tightening loose bolts on a sports car to ensure smooth rides. My routine of quick inspections kept my monitor secure during marathon sessions, making the workspace safer and more comfortable. Remember, a secure setup isn’t just about avoiding falls—it’s about creating an immersive, uninterrupted viewing experience. For the latest insights and improvements, explore workspace transformation tips.
Many enthusiasts and newcomers alike often assume that larger, curved monitors automatically translate to better immersive experiences or increased productivity. But let’s dig deeper into the nuances that commonly trip people up, revealing hidden pitfalls and myths that can hold you back from maximizing your setup.
Are Bigger Always Better When Choosing a Curved Screen?
Contrary to popular belief, bigger does not always mean better. A common mistake is assuming that ultrawide, massive displays will seamlessly improve your experience. However, the size and curvature must match your viewing distance and desk setup. An overly large monitor in a tight space can lead to excessive neck movement or eye strain, reducing its benefits. Experts emphasize the importance of optimal viewing angles and distance—typically, sitting too close to a large curved display can distort visuals or cause discomfort, negating any immersive advantage. Proper calibration and size matching are crucial for true enhancement, not just for aesthetics.
Beware the Myth of the Curvature Radius
Many think that the larger the curvature radius (measured in R—like 1000R), the more immersive the experience. But in reality, a very aggressive curve can distort images or create unnatural viewing angles, especially on smaller desks. Excessively curved screens may cause peripheral distortion, making people perceive objects differently depending on where they sit. According to recent studies, like those from this resource, 1000R curvature offers a natural, film-like experience that aligns well with human vision, but anything too steep can be counterproductive. Understanding the nuances of curvature is vital to selecting the right display for your space and needs.Maintaining your widescreen monitor or curved TV is essential to ensure long-term performance and a consistently immersive experience. I personally rely on a combination of professional calibration tools and maintenance routines that I’ve tested and refined over years. For color accuracy and image clarity, I swear by the X-Rite i1Display Pro calibration device—it’s precise, user-friendly, and offers industry-standard calibration profiles, which are vital for avoiding eye strain and ensuring your colors stay true over time. Pair this with DisplayCAL software, an open-source option that integrates seamlessly and provides detailed calibration reports, giving you confidence that your display remains optimized.
Hardware-wise, I always use compressed air and microfiber cloths to keep dust out of vents and screen surfaces. Dust and dirt accumulation can gradually reduce contrast and cause uneven backlighting, especially in ultra-wide or curved displays. Regularly cleaning your monitor with gentle strokes prevents buildup, minimizing the need for costly repairs.
For software tools, I recommend using União Software’s monitor management suite, which allows for easy profile switching—helpful if you switch between color-sensitive tasks like video editing and gaming. Regularly updating your display drivers via the GPU manufacturer’s utility ensures compatibility and harnesses the latest performance enhancements.
Looking ahead, the trend seems to be moving toward AI-driven calibration and maintenance tools. These smart systems can adjust brightness, contrast, and color balance dynamically based on ambient lighting or specific task needs, reducing manual effort and maintaining optimal visuals automatically.
**How do I maintain my widescreen setup over time?** The key is establishing a routine that combines physical cleaning, software calibration, and staying current with driver updates. Incorporate quick monthly checks using calibration devices or software to verify color accuracy, and clean your hardware quarterly. For detailed, professional calibration, I encourage trying tools like the X-Rite i1Display Pro—it’s an investment that pays off by prolonging your display’s lifespan and enhancing your viewing experience. Interested in taking this a step further? Explore advanced calibration techniques documented in professional publications like the *Display Calibration and Optimization Guide* by the Display Manufacturer’s Council, which can be found in industry forums and official documentation.
Keeping your immersive screens in top shape isn’t just about longevity; it’s about always experiencing the best visuals possible. For personalized advice or to address any setup challenges, don’t hesitate to contact experts—visit [this contact page](https://curvedtvs.ultimatehomedisplays.com/contact-us) for tailored support.
The Inside Scoop on Overcoming Setup Pitfalls
One of the biggest lessons I learned is that even the most innovative curved monitors require meticulous planning for stability. I once underestimated the importance of a robust mount, only to face wobbling issues during intense gaming marathons. Lastly, embracing regular maintenance routines—like cleaning and recalibrating—has been a game-changer in preserving immersive quality. Trust me, a little extra effort here saves headaches down the line.
Top Tools and Resources I Swear By
For anyone serious about elevating their immersive screen experience, I recommend the X-Rite i1Display Pro for precise calibration—it’s been invaluable in maintaining color accuracy over years. The DisplayCAL software complements it perfectly, offering detailed profiles that keep my visuals sharp. Additionally, visiting authoritative sources like this guide has expanded my understanding of ultrawide benefits. Finally, the professional-grade monitor mounts found at this contact page have secured my setup, preventing wobbling and ensuring safety.
Your Vision Begins Now
Transforming your workspace into an immersive haven with a curved monitor is more than a purchase—it’s a lifestyle upgrade. Embrace the tweaks, invest in quality tools, and watch your productivity and enjoyment soar. The future of visual excellence is within your grasp—dive in today and redefine what’s possible with your display setup!
This post really hits home for me, especially the part about stabilizing large, curved monitors in small spaces. I’ve struggled with wobbling mounts ever since I upgraded to a 34-inch ultrawide, and it never felt secure enough for long gaming or work sessions. I especially liked the idea of reinforcing with custom brackets or clamps—DIY solutions can be surprisingly effective if you have the right materials. Since I live in an apartment where wall mounting isn’t an option, I wonder if anyone here has tried heavy-duty adjustable clamps or even weighted bases to improve stability without damaging their desks? Also, I appreciate the tip about regular maintenance like cleaning and periodic tightening; those small routines can really extend the life and performance of the setup. For those still battling monitor wobble, what’s your go-to method or brand for reliable mounting? Would love to hear more personal tips or brands that have worked well for you.