I remember the moment vividly — I was deeply engrossed in a gaming session when a sudden wave of discomfort hit me. The intense curvature of my trusted 1000R monitor, which once seemed to draw me right into the action, now felt overwhelming and almost suffocating. My eyes strained, my neck ached, and I realized I was fighting the very tool that was supposed to enhance my experience. That was my lightbulb moment — I needed a change.
Reevaluating the Curved Monitor Experience
For years, I believed that a more aggressive curve meant better immersion and reduced eye strain. But as technology advanced and my understanding deepened, I started questioning whether bigger was always better. In 2026, I decided to experiment with an 800R panel. Why? Because recent studies suggest that the optimal curvature for most users is closer to 800R, balancing immersion with comfort. You might wonder, “Isn’t more curvature better?” Well, not necessarily. The truth is, the ideal curve varies based on viewing distance and personal preference.
Initially, I fell into the trap of thinking that a higher curvature would make my gaming and work sessions more immersive. I was wrong. A mistake many make early on is equating curvature numbers directly with comfort, without considering their own setup and eye health. This misstep can lead to unnecessary eye strain or distorted images, especially during long sessions.
To navigate this, I explored authoritative insights, which highlight that excessive curvature can cause distortion and discomfort over extended use, counteracting the original ergonomic benefits. According to experts from Ultimate Home Displays, the 1000R curve is designed for viewing distances of about a meter, but many users sit farther back, where an 800R or even flatter might actually feel better.
So, what does this mean for you? Are you stuck with a curved monitor that’s just a little too aggressive? Or maybe you’ve felt the same discomfort but couldn’t quite put your finger on why? If so, you’re not alone. Many have experienced this revelation as they dive deeper into ergonomics and screen technology. The key is finding that sweet spot—where immersion meets comfort—so you can focus on your work and leisure without unnecessary fatigue.
In the next sections, I’ll walk you through how I made the switch, what I learned along the way, and how you can determine if an 800R panel or a different curvature might be the perfect fit for your setup. Ready to discover the right balance? Let’s go!
Start with Your Ideal Viewing Distance
Measure how far you sit from your monitor in your typical setup. For most desktops, a distance between 60-80 cm (2-2.5 feet) is common. Use a tape measure to get an accurate number, then compare it to recommended curvature ratios. For example, at 70 cm, an 800R curve aligns better with ergonomic standards than a 1000R. I once adjusted my position after realizing I sat 75 cm from my screen, and switching to an 800R monitor significantly reduced eye strain during long gaming marathons.
Match the Curve to Your Use Case
Assess whether your primary activity is gaming, professional work, or creative tasks. Gamers benefit from deeper curves like 1000R, which mimic the human eye’s natural focus, especially for immersive titles. However, for productivity or digital art, a less aggressive curve like 800R or 1800R reduces distortion and helps maintain accurate line work. I tested an 800R monitor for a week while working on graphic design projects; the less intense curve made details easier to see without the exaggerated warping often experienced with 1000R displays.
Evaluate Your Desk and Seating Arrangement
Your monitor’s size and position impact how well the curve works. If you have a large, ultrawide display, a curve that matches your seating position creates a seamless panoramic effect. For a 49-inch ultrawide, a 1000R curve provides excellent immersion, but if your desk configuration places you farther back, a flatter curve like 800R might offer better clarity. Once, I pushed my ultrawide closer to my chair and found the 1000R curve overwhelming, causing distortion; lowering to an 800R provided a more balanced view without sacrificing immersion.
Experiment and Adjust Your Setup
Don’t settle on a curve immediately. Purchase or test models with different radii, and observe your comfort over several days. Adjust your height, tilt, and distance to optimize viewing angles. I borrowed an 800R monitor for a few days and kept notes on eye fatigue levels. The moderate curve felt natural and less fatiguing than the more aggressive 1000R setup I initially tried. If possible, visit local stores to see various options firsthand or use online trial programs to compare.
Optimize Your Screen Positioning
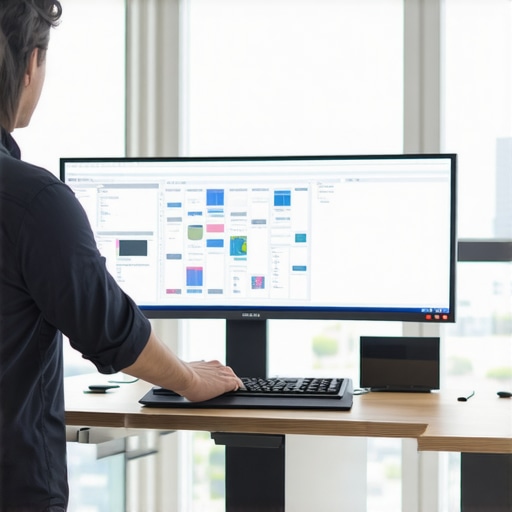
Proper placement minimizes distortion and strain. Position the monitor so the top is at or slightly below eye level, and ensure the curvature aligns with your gaze. Use adjustable stands or mounts for precise placement. I secured my monitor on an adjustable arm, which allowed fine-tuning of tilt and height, aligning the screen’s curvature perfectly with my seating posture. This small change drastically improved my comfort during extended sessions.
Incorporate Additional Ergonomics
Complement your curved monitor with ergonomic accessories. Use a monitor mount to keep the screen at optimal eye level, and consider anti-glare filters to reduce reflections. During a messy setup, I added a monitor arm and a matte screen protector, which together minimized glare and unwanted reflections, making my curved display more comfortable for long-term use. Remember, the goal is to create a seamless, immersive experience that feels natural to your eyes and body.Many enthusiasts believe that a curved monitor or ultrawide display automatically guarantees immersive, comfortable viewing. However, this oversimplification can lead to significant misunderstandings. One common myth is that larger curves or wider screens always enhance immersion. In reality, the effectiveness of a curve depends heavily on your seating distance, screen size, and use case. For example, a 1000R curve may seem ideal, but if you sit farther from the screen, it can distort images or cause eye strain, contrary to what simplistic assumptions suggest. Studies from Ultimate Home Displays reveal that optimal curvature is highly personal and situational, challenging the one-size-fits-all mindset.
Another trap is assuming that all curved screens produce fewer distortions. Many users overlook that excessive curvature can warp peripheral images, especially during fast-paced gaming or detailed editing. For example, an expert consensus states that beyond a certain point, increased curvature adds more distortion than immersion benefits, which can undermine the very ergonomic advantages you seek.
Why does the shape of a screen matter so much for professionals and gamers alike?
It’s because a poorly matched curvature affects visual clarity, causing eye fatigue, headaches, or spatial distortions that hinder your productivity or gaming performance. The key is aligning the curvature with your typical viewing distance and tasks—don’t fall for the misconception that bigger or more aggressive curves are universally better. Instead, experiment with different radii, adjust your seating position, and consider your work and play habits. For instance, if you’re into detailed graphic design, a flatter curve like 800R may serve you better, reducing warping around the edges and providing more accurate color representation. If you want to learn how to optimize your setup, check out detailed guides on creating an ergonomic workspace. Remember, the right curve can transform your experience— but only if you understand the nuanced differences. Have you ever fallen into this trap? Let me know in the comments.
How do I keep my curved monitor and ultrawide display in top shape over time?
Maintaining your high-end display requires more than just occasional cleaning. I personally recommend investing in a quality screen cleaning kit that includes microfiber cloths and gentle cleaning solutions designed specifically for screens. Regularly wiping your display prevents dust and smudges from accumulating, which can degrade image quality and cause unnecessary wear. For example, I use a solution that minimizes static buildup, helping to avoid attracting more dust — a crucial factor for maintaining clarity during long work or gaming sessions.
Beyond cleaning, controlling environmental factors is essential. Keeping humidity levels in check and avoiding direct sunlight reduces the risk of color degradation or warping, especially for OLED-based systems prone to burn-in. Installing privacy filters or anti-glare coatings can also reduce reflections and protect your screen’s surface over the years. When I noticed reflections becoming a distraction, I added an anti-glare film to my curved TV, which significantly improved my viewing experience during daytime use.
Hardware health is equally critical. Use software tools like DisplayCAL to calibrate your monitor regularly, ensuring the colors remain accurate after extended use. Calibration not only preserves image fidelity, but it can also help identify potential issues before they become serious. I set a monthly reminder to run calibration routines; this proactive approach has extended the lifespan of my display and maintained visual consistency.
Since technology advances rapidly, keeping firmware and driver software up to date also plays a vital role. Manufacturers often release updates that improve performance, fix bugs, or enhance compatibility with new graphics cards and operating systems. I check for updates every few weeks via the manufacturer’s support portal or dedicated software utilities, ensuring my setup operates smoothly and maximizes its potential.
Looking ahead, I believe that smart display maintenance will incorporate AI-driven diagnostics, predicting hardware failures before they occur. This would enable preemptive repairs, minimizing downtime and preserving the immersive experience you crave. To stay ahead, consider exploring advanced management tools like workspace optimization guides that include maintenance strategies tailored for immersive screens.
If you want to elevate your setup further, try implementing a routine calibration with DisplayCAL—it’s a powerful yet accessible tool that can refine your display’s color profile and detect potential issues early. Incorporating these best practices will ensure your investment continues delivering the stunning visuals and immersive experience you expect for years to come.
Lessons Curved Displays Taught Me That You Should Not Ignore
- Not Every Curve Is Perfect for Everyone: I initially believed that a higher radius like 1000R was universally optimal for immersion, but personal experience showed that a moderate 800R often results in less eye strain, especially when your seating distance varies. This taught me that customization beats one-size-fits-all solutions every time.
- Sitting Position Matters More Than You Think: Adjusting my chair and monitor height to align with the monitor’s curvature drastically improved comfort. I learned that even the perfect monitor can be misused if your posture isn’t optimal, emphasizing that ergonomic awareness is crucial.
- Testing Is the Key to True Comfort: Rushing into a purchase or setup without trying different curves can lead to discomfort. I recommend borrowing or demo-testing monitors with different radii to discover what truly feels natural for your eyes and body.
- Calibration Goes Beyond Colors: Regularly calibrating my display helped me catch subtle distortions caused by excessive curvature or misalignment, which in turn prevented long-term eye fatigue. Proper calibration is an investment in your visual health.
- Environment Shapes Experience: Lighting, glare, and desk setup all affect how a curved monitor performs. I learned to optimize ambient conditions—like adding anti-glare filters or repositioning lights—to enjoy the immersive experience without strain.
My Go-To Tools That Elevate My Screen Game
- DisplayCAL: This calibration tool has become my trusted companion for maintaining color accuracy and detecting distortions, ensuring my monitor’s shape isn’t causing unseen discomfort. It’s accessible yet powerful, perfect for enthusiasts committed to quality.
- Ergonomic Chairs and Mounts: Adjustable stands and ergonomic seating have made a significant difference, allowing me to sit at the optimal distance and angle tailored to my monitor’s curve. Quality hardware is essential for comfort over hours of use.
- Ambient Light Control Devices: From smart lights to anti-glare screens, managing my environment has reduced reflections and eye fatigue. I trust products that adapt to different lighting conditions for a better immersive experience.
- Community Forums and Reviews: The collective wisdom from dedicated forums and review sites helped me understand real-world experiences with various curvatures. They’re invaluable for making informed decisions based on diverse setups and preferences.
Take the Leap Toward Your Best Visual Experience
Immersive screen and curved monitor setups hold the promise of elevating both work and play—but only when aligned with your personal needs and environment. Don’t be afraid to experiment with different curvatures, adjust your workspace, and invest in quality calibration tools. Your journey to a more comfortable, immersive experience begins now—are you ready to discover your perfect curve? Have you ever struggled with choosing the right monitor or making ergonomic adjustments? Share your story below and let’s learn together.