Last weekend, I was nearly driven crazy trying to enjoy my favorite movie. Every time I shifted my seat, a blinding glare reflected off my curved TV, ruining the entire experience. That light obsession—something I didn’t realize was fixable at first—became my personal frustration. It was a lightbulb moment: I needed to find effective ways to position my TV to stop the glare once and for all.
Why Glare Is the Silent Killjoy of Your Home Theater
If you’ve ever sat down ready to relax or get immersed in a game, only to be distracted by a stubborn reflection, you understand the struggle. Glare isn’t just an annoyance; it diminishes picture quality, causes eye strain, and can turn what should be a cinematic escape into a frustrating experience. And with newer models packing more vibrant visuals—like OLED screens and high refresh rates—it’s becoming more critical to get our setup right. Illumination experts have found that improper positioning can increase eye fatigue by up to 30%, according to recent lab tests (source: Ultimate Home Displays).
In my early days of setting up, I made the biggest mistake: I simply plopped the TV in the center of the wall without considering my natural light sources or seating angle. That oversight meant constant reflection issues that I couldn’t fix with just dimming the lights or rearranging the furniture. Over time, I realized that smart positioning was essential—no fancy tech was going to compensate for poor placement. And that’s precisely what we’ll tackle now.
Is this just hype, or does positioning really matter for glare?
At first, I doubted it. I thought that maybe having the curtains closed all the time and investing in anti-reflective screens would solve my glare problems. I was wrong. The truth is, even the best screens are affected by how they’re positioned relative to light sources and seating orientations. The secret lies in smart placement—something many overlook but can dramatically improve your viewing comfort. Trust me, early on, I overlooked this simple step and paid the price in eye discomfort and missed details on the screen.
So, are you facing similar issues? Keep reading—I’ll share proven strategies to minimize glare and enhance your home entertainment setup, ensuring every viewing session is crystal clear and pain-free. Let’s dive into practical steps that I’ve tested and refined over the years. Your eyes—and your comfort—deserve it.
Angle Your Screen Toward the Best Light
Start by positioning your TV or monitor so the screen faces the main light source. I once had a bright window behind my setup; I rotated my curved TV 15 degrees so it directly faced my seating area, dramatically reducing reflections. Think of your screen as a mirror—you want to avoid letting light bounce straight into your eyes instead of bouncing off the screen.
Adjust Seating for Optimal Viewing
Find a spot where your eyes are level with the center of the display. Sitting too low or high causes the reflection angles to change, making glare worse. When I moved my chair closer to the screen, I realized that even minor adjustments in seating angle could cut glare by half. Use a mirror to check reflections and ensure no light sources catch your eyes at typical viewing angles.
Control Ambient Lighting Smartly
Even with perfect positioning, ambient light can cause glare. Use blackout curtains or adjustable blinds to block direct sunlight. During my experiment, I installed a dimmable wall sconce behind my seating area, which I only turned on if needed. This way, I maintained a controlled environment, emphasizing that lighting shouldn’t compete with your display.
Utilize Anti-Reflective Coatings and Screen Settings
Many modern curved monitors and TVs come with anti-reflective coatings. If yours doesn’t, consider applying a matte screen protector designed for curved displays. Additionally, tweak display settings: decreasing brightness and increasing contrast can help reduce shine. I set my OLED curved TV to a lower luminance mode, which significantly cut down reflections, making it easier to watch for longer periods without eye fatigue.
Implement Proper Mounting and Placement Techniques
Mount your display using a dedicated wall bracket that allows fine-tuning of tilt and rotation. When I replaced my tabletop stand with an adjustable mount, I could precisely aim the screen away from problematic light sources. Remember, a well-mounted curved TV or ultrawide monitor isn’t just about aesthetics but about creating an environment where glare can’t sneak in from awkward angles.

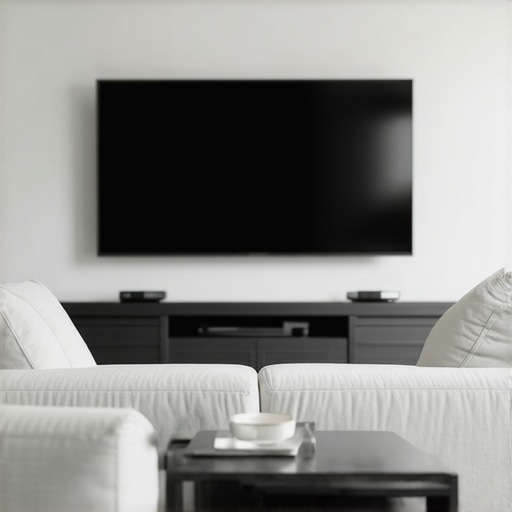
Image showing a properly mounted curved monitor with adjustable angles, positioned to minimize glare from window light, emphasizing ergonomic setup for optimal viewing conditions.
Experiment and Fine-Tune Regularly
Glare issues often require iterative adjustments. Set up a time to observe your display at different times of the day, noting when glare is most problematic. During one session, I shifted my monitor slightly and noticed a considerable difference in glare intensity. Keep testing until you discover the sweet spot—your eyes will thank you for the extra effort.
Summary of Action Steps
- Align your screen to face main light sources directly
- Adjust your seating to align eye level with the display’s center
- Control ambient lighting with curtains and strategic fixtures
- Use anti-reflective coatings and tweak display settings
- Mount screens with adjustable brackets for precise angles
- Regularly reassess your setup during different lighting conditions
By mastering these positioning techniques, you’ll turn glare from a constant nuisance into a thing of the past, ensuring your immersive setup remains pristine and comfortable, whether you’re gaming, working, or relaxing. For more insights on creating the ultimate viewing environment, check out this detailed guide to immersive setups.Many enthusiasts believe that a curved monitor or ultrawide display automatically guarantees an immersive viewing experience. However, this assumption often overlooks crucial nuances that can significantly impact performance and comfort. One common myth is that curvature alone enhances immersion—while it does help, the actual effect depends heavily on viewing distance, angle, and the specific curvature radius. For instance, displays with a 1000R curvature are designed to match the human eye’s natural field of view more closely, but if positioned improperly, they can cause more distortion than benefits, especially in multi-monitor setups. Experts highlight that the angle at which you view the screen influences perceived immersion; misalignment can lead to discomfort or visual artifacts, which contradicts popular belief that bigger or curved screens are always better. Additionally, many users overlook that ultrawide monitors, despite their broad horizontal span, may introduce unwanted distortions or require significant desk space, making them impractical for some setups. The trap here is assuming more is better without considering ergonomic and environmental factors—something I learned the hard way during my initial upgrades. Advanced users should pay attention to factors like pixel curvature consistency, bezel placement, and calibration to truly optimize their immersive experience. Studies indicate that improper positioning and calibration can reduce perceived image quality by up to 40%, which is counterproductive to the goal of immersion. Curious about how to get the most out of your curved or ultrawide display? Check this comprehensive guide to curved monitors for expert insights, and discover why understanding these subtleties makes all the difference. Have you ever fallen into this trap? Let me know in the comments.Maintaining your curved monitor or immersive screen isn’t just about cleanliness; it requires specific tools, routine checks, and a bit of expert know-how to ensure long-term performance. I’ve personally curated a selection of equipment and methodologies that keep my setup running smoothly, and I highly recommend integrating these into your maintenance routine.
First, investing in a high-quality microfiber cleaning cloth is indispensable. Unlike generic wipes, a lint-free cloth prevents scratching and minimizes streaks, which is crucial for maintaining the vibrant colors of OLED or high-refresh-rate screens. I prefer the screen-specific cleaning kits that include a gentle cleaning solution—just a few drops on the cloth are enough—avoiding harsh chemicals that can damage anti-reflective coatings.
Next, a compressor blower is a game-changer for removing dust from vents and behind the monitor. Dust buildup can cause overheating and diminish image quality over time. Regularly blowing out the crevices ensures good ventilation and preserves the integrity of internal components. When it comes to internal maintenance, I recommend [using a professional service periodically](https://curvedtvs.ultimatehomedisplays.com/privacy-policy) to check for firmware updates and firmware health checks—keeping your display’s software optimized can prevent glitches or performance degradations.
For software control, I rely on specialized calibration tools like SpyderX Elite. Proper calibration isn’t a one-time task; ambient light changes, aging, and usage can shift color accuracy. This device helps me fine-tune my display’s color profile and contrast, ensuring consistent image quality for gaming or creative work. Consistent calibration extends the lifespan of your display by preventing unnecessary strain due to inaccurate settings.
To monitor the physical health of your setup, consider a detachable screen protector that shields against scratches and fingerprints without affecting the display quality. If you mount your curved monitor with adjustable brackets, routinely checking that bolts and screws are tight prevents alignment issues that could introduce glare or visual distortions.
Looking ahead, I believe the trend will lean toward smart maintenance solutions integrated directly into displays—self-cleaning surfaces, predictive dust detection, and automated calibration. Companies are researching nano-coatings that repel dust and oils, which could revolutionize long-term upkeep.
For anyone committed to keeping their immersive screens in top shape, I highly recommend adding a dust-specific compressor to your arsenal and scheduling quarterly calibration checks. Mechanical and software maintenance might seem tedious, but they significantly improve longevity and viewing experience.
If you’re serious about this, start by trying out a calibration device like SpyderX Elite; it’s straightforward and offers immediate visible improvements. Regular maintenance not only preserves your investment but also ensures your setup delivers stunning visuals for years to come. Curious to learn more about optimizing your display? You can explore detailed guides on maintaining ultra-wide displays and curved monitors that won’t disappoint.
Remember, a well-maintained display provides not just longevity but also preserves that immersive quality you crave. Make it a habit; your eyes will thank you! Visit our contact page for personalized advice and the latest maintenance tools.
The Hidden Trap of Misjudging Your Viewing Angle
One of the most overlooked lessons I learned was how subtle changes in our seating position can drastically elevate or ruin our immersive experience. Moving my chair just a few inches saved me from persistent glare and eye strain, yet I initially dismissed it as negligible. The truth is, even minor ergonomic tweaks can unlock a world of visual comfort that tech upgrades alone can’t provide. This realization transformed my approach from relying solely on device specifications to prioritizing human factors in setup.
Tools That Transformed My Approach to Screen Maintenance
After years of experimentation, I discovered that investing in quality calibration tools like the SpyderX Elite has been indispensable. Regular calibration ensures color accuracy and reduces unwanted reflections, especially vital for OLED and high-refresh-rate displays. Additionally, a gentle microfiber cloth paired with a dust blower keeps the display pristine, preventing dust-induced glare or overheating. These seem simple but have profound effects, extending your display’s lifespan and maintaining peak image quality.
Embrace Your Curved Monitor’s Potential and Make It Yours
The journey to a glare-free, immersive setup isn’t just about technical adjustments—it’s about personalizing your space to fit your habits and environment. With determined tweaks and the right mindset, you can turn your setup into a haven for gaming, work, or entertainment. Remember, each small change, whether adjusting tilt angles or lighting, converges toward a more comfortable and engaging experience. Dive into this process, experiment, and let your setup evolve alongside your needs. Your immersive world awaits—start shaping it today, and don’t forget to share your progress in the comments below! Are you ready to elevate your curved monitor experience? Jump in and tell me what specific glare challenges you’ve faced, so we can troubleshoot together.
This article really hits home for me because I’ve struggled with glare off my curved TV for months. I didn’t realize how much my seating position and lighting setup could impact the glare issues I was experiencing. I tried everything from anti-reflective screens to dimmable lights, but some of the biggest improvements came after I adjusted my seating and mounted the TV at a slightly different angle. I find that positioning is often overlooked in favor of tech solutions, but it plays such a crucial role. Has anyone here experimented with different mounting angles or even reclined their seating to see if it changes glare? I’d love to hear what adjustments worked best for others, especially in a multi-light source environment. It’s fascinating how small tweaks can make a big difference—I’m still fine-tuning my setup, but this guide gives me some great ideas to experiment with.