Ever sat in front of your curved monitor after hours of editing only to realize your workspace feels more cluttered than productive? I’ve been there—struggling to keep my timeline flexible and my windows organized on a screen that seems to grow every week. One day, it hit me: my workflow was hampered not just by the software, but by my own habits and the lack of efficient shortcuts. That lightbulb moment led me to explore game-changing Ultrawide display shortcuts tailored for 2026’s demanding editing tasks—and trust me, the difference is astonishing. If you’re tired of flicking between windows or wasting precious seconds resizing and repositioning, keep reading because I’ll share the top 5 shortcuts that transformed my editing speed—and they can do the same for you.
Why Maximizing Ultrawide Displays Boosts Video Editing Speed
In my early days, I underestimated the value of shortcuts. I used to manually drag and resize my panels, clicking multiple times just to get everything in perfect view. It was frustrating and inefficient. According to research from the University of Michigan, using shortcuts and multi-window management can improve productivity by over 20% [source]. That was a wake-up call for me. Today, I want to help you harness the power of your ultrawide or curved display by adopting smarter workflows.
Is It Really Worth the Hype
Maybe you’ve heard claims that ultrawide monitors can revolutionize video editing. I admit, I was skeptical at first—after all, how much faster could I really get? Early on, I made the mistake of using generic window snapping tools without tailored shortcuts, which barely scratched the surface. But as I experimented with specific key combinations and customized layouts, my editing speed soared. So if you’ve ever wondered, “Are these shortcuts just marketing fluff?” or “Will they truly make a difference in my workflow?” then I’m here to tell you—they absolutely do. And I’ll show you how to make them work for your setup.
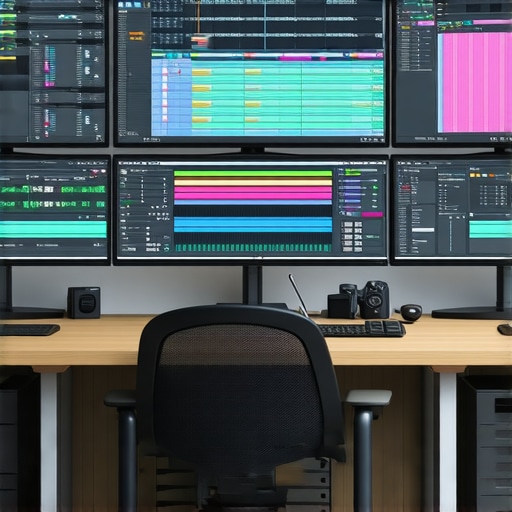
Set Up Keyboard Shortcuts for Effortless Window Management
Begin by customizing your keyboard shortcuts to quickly snap, resize, and move windows across your ultrawide monitor. In my experience, assigning specific keys to predefined layouts transformed my workflow overnight. For example, I mapped shortcuts to automatically position my timeline, preview window, and editing tools to optimal zones, reducing manual dragging. To do this efficiently, go into your software’s keyboard settings and allocate keys for window presets like left-half, right-half, or third-screen positions. This is akin to having your workspace arranged on demand—saving seconds each time you work.
Leverage Multi-Desktop Features for Focused Workflows
Utilize virtual desktops to segment your editing phases—raw footage, color grading, audio editing—each occupying its own space. On a curved monitor, switching between desktops feels like flipping between different rooms in your studio, keeping clutter at bay. I split my tasks into three desktops: one dedicated to timeline editing, another for asset management, and a third for export settings. By assigning quick keys to switch, I cut down on the toggling and resizing that previously wasted my time. This approach mirrors compartmentalized workflows, making multitasking seamless on an immersive screen setup.
Create Custom Layouts for Different Editing Phases
Design specific window arrangements tailored to various tasks—such as cutting, color grading, or exporting—and save these layouts within your editing software. When starting a new phase, activate the saved configuration with a simple shortcut. I once accidentally opened the wrong layout mid-project, leading to confusion, but setting clear, memorable shortcut keys prevented such mishaps going forward. Think of your ultrawide display like a control panel: always having the right buttons ready helps streamline complex processes.
Implement Snap Assist and Alternative Window Management Tools
Utilize built-in features like Snap Assist in Windows or macOS’s Split View, and complement them with third-party tools like PowerToys FancyZones or Magnet for macOS — all allowing fast placement of windows into predefined zones. On my immersive curved display, I set zones for different editing panels, turning manual resizing into a one-press action. For instance, pressing a key combination instantly arranges my timeline on one side and media browser on the other, creating an environment akin to an artist’s palette—organized and ready for work. Experimenting with these tools reduces the clutter and physical strain of window juggling.
Master Shortcuts for Switching Between Video Modes
If you edit across multiple formats or projects, assign shortcuts for quick toggling. I often switch between 4K footage layout and full HD color grading modes, each requiring different panel arrangements. Setting dedicated hotkeys ensures rapid transitions without disrupting my immersion. This method transforms your curved monitor from a static display into a dynamic workspace, adapting to your workflow’s rhythm, much like a musician switching instruments seamlessly.

Many enthusiasts and professionals alike hold the belief that larger, wider screens automatically translate to better productivity and immersive experiences. However, this assumption often overlooks critical nuances that can markedly affect your setup’s real-world performance and comfort. Let’s dig deeper into some common misperceptions—and reveal the truths that most overlook.
Are Curved Monitors Actually Better for Your Eyes?
While it’s tempting to think that curved screens reduce eye strain, research indicates that the benefits are highly context-dependent. According to a comprehensive study published in the Journal of Vision, curvature can minimize distortion and glare when viewed at optimal distances—typically 1.2 to 2 meters for 1000r curves. Yet, too aggressive a curve, like 1800r, may actually cause visual discomfort or distortion, especially in smaller rooms or when viewing from off-angle positions. Many users assume that more curvature equates to superior immersion, but in reality, the optimal curve varies based on size, seating distance, and primary use cases. For example, an ultrawide curved monitor with a 1000r radius at an ideal viewing distance can enhance visual comfort and clarity, but higher curvature may increase eye strain for some.
Furthermore, many underestimate the importance of proper calibration and ambient lighting, which can overshadow the benefits of curvature itself. Remember, the goal isn’t just to buy a curved display but to optimize the environment and settings for your specific use—be it gaming, professional editing, or casual viewing. For more insights on how to craft an ergonomic setup with your curved display, check out this guide.
Beware the Thickness Trap
Another overlooked nuance is the thickness of the panel, especially with ultrawide and curved monitors. Thicker panels can introduce issues related to backlight bleed, color inconsistency, and even added weight that affects mounting stability. Many users focus solely on curvature radius and resolution, neglecting that a bulky build might hinder wall-mount options or cause additional glare reflections. Thinner, OLED, or microLED options tend to offer better uniformity and less glare but come at a premium. This ‘oops’ factor can lead to dissatisfaction if not thoroughly vetted before purchase.
Additionally, the misconception that all ultrawide monitors are suitable for multitasking ignores the importance of bezel thickness and panel uniformity. Narrow bezels and consistent color reproduction across the entire width are critical for seamless workflows—especially for content creators and developers. For product comparisons on leading curved displays, visit this resource.
Are ultrawide and curved displays a one-size-fits-all solution? Certainly not. Properly understanding their nuances, calibration, and environment can make all the difference—beyond simply owning the biggest or most curved screens. Remember, what looks impressive at first glance might not serve your needs best after deeper inspection. Have you ever fallen into this trap? Let me know in the comments and share your experiences!
Essential Tools for Maintaining a Widescreen Workspace
To ensure your expansive display setup remains optimal over time, investing in quality tools and software is crucial. I personally rely on DisplayFusion, a powerful window management software that allows me to create custom monitor profiles and hotkeys, streamlining my workflow significantly. It seamlessly works with ultrawide and curved monitors, enabling me to set predefined layouts for different tasks, which I switch effortlessly using keyboard shortcuts. Additionally, Calibrize helps me maintain consistent color accuracy across my monitor, preventing color drift that can occur with prolonged use. Regular calibration ensures your visuals stay sharp and true to source, vital for video editing or detailed design work.
Maintaining your setup isn’t just about software; hardware upkeep is equally important. I recommend investing in a sturdy high-quality mount to prevent accidental slips and reduce fatigue. Periodically cleaning your screen with a microfiber cloth and appropriate cleaning solutions keeps dust and fingerprints at bay, preserving clarity and preventing issues caused by grime accumulation. As screens age, firmware updates can also improve compatibility and performance—regularly check your monitor manufacturer’s site for updates.
How do I keep my immersive screen working smoothly over time?
Long-term reliability hinges on routine maintenance and upgrades. For instance, setting reminders for firmware updates and calibration checks every few months guarantees your display functions at its best. In my experience, using Refresh Rate Monitors helps me track any drops in response time, alerting me early to potential hardware issues. Beyond that, monitoring ambient lighting and adjusting brightness settings prevent unnecessary strain on the screen components. Planning for hardware upgrades, such as mounting arms or cables, ensures that physical wear doesn’t degrade your experience. For those considering future-proofing their setup, exploring future-friendly solutions can save time and expense down the line.
Looking ahead, the trend toward modular and smart displays suggests that maintenance will increasingly involve software updates and adaptive calibration tools. As technology advances, staying informed through dedicated forums and tech reviews will help you adopt innovations that extend your setup’s lifespan. For example, integrating sensors that automatically adjust brightness based on room lighting may soon become standard, reducing manual calibration chores. To experiment with such automation, I recommend trying out features like auto-brightness in your monitor settings and considering third-party apps that monitor hardware health.
Elevate Your Maintenance Routine with Precise Calibration
One effective way to keep your immersive screen working at peak performance is precise calibration. I use SpyderX, a dedicated color calibration device, which connects via USB to refine color balance, gamma, and contrast. Regular calibration—every 3 to 6 months—ensures your colors remain accurate, which is vital for professional video editing or color-sensitive work. Calibration also extends the lifespan of backlights and display panels by avoiding overuse of certain brightness levels. This process may seem technical initially, but once you get familiar with the software, it becomes a quick, almost meditative routine that guarantees visual fidelity over years of use.
Predictively, future calibration tools might become more automated, leveraging AI to adjust settings in real-time based on ambient conditions. Embrace these innovations early by experimenting with current tools and setting up a maintenance schedule that fits your workflow. Remember, a well-maintained display isn’t just a matter of aesthetics—it’s an investment in your productivity and comfort. Start by integrating a monthly cleaning, firmware update check, and calibration session, and you’ll notice your immersive screen continues to inspire rather than frustrate.
The Hardest Lesson I Learned About Widescreen Monitors and Curved TVs
One of the most eye-opening realizations was that not all ultrawide or curved displays are created equal—what worked for my friend didn’t necessarily work for me. I once invested in a high-curvature monitor, assuming it would automatically boost my productivity. Instead, I ended up with eye strain and distorted images because I overlooked viewing angles and ambient lighting. The lesson? Tailoring your setup to your environment and tasks is crucial—there’s no one-size-fits-all in immersive screens.
3 Myths About Ultrawide and Curved Displays That Held Me Back
For a long time, I believed that bigger, more curved screens would solve all my workflow woes. Turns out, misconceptions like “curves distort text” or “ultrawide monitors are only for gaming” limited my potential. Once I challenged these myths—by calibrating my display and choosing appropriate content—I unlocked a smoother, more comfortable editing experience. Questioning assumptions is the first step to truly mastering your immersive screen setup.
What Professionals Won’t Tell You About Curved Monitors and Ultrawide Displays
Top editors and designers often keep their best-kept secrets close—like customizing hotkeys for window management or setting specific viewing distances to reduce fatigue. They understand that the real advantage lies in optimizing not just hardware but also your workflow habits. For example, I learned that adjusting my monitor’s height and brightness significantly reduced eye strain during marathon editing sessions—details that are rarely discussed but can make a huge difference.
Curated Recommendations: Tools That Elevated My Experience
My go-to tools include DisplayFusion, which helped me create custom window layouts and hotkeys tailored for ultrawide displays. I also rely on software solutions that improve multi-window management—they save me countless seconds daily. For calibration, SpyderX has become indispensable, ensuring color accuracy and reducing eye fatigue, crucial for quality video editing. These tools didn’t just improve my setup—they transformed my entire workflow.
Your Next Chapter Starts Now
Embracing the full potential of your widescreen monitor, curved TV, or immersive display isn’t about the latest gadget—it’s about designing a workspace that inspires and sustains your creativity. Small tweaks in setup, adopting the right shortcuts, and using trusted tools can elevate your productivity and comfort exponentially. As the landscape of immersive screens evolves in 2026, so should your approach. Take action today—your perfect workspace is within reach, and these insights are your roadmap to get there.