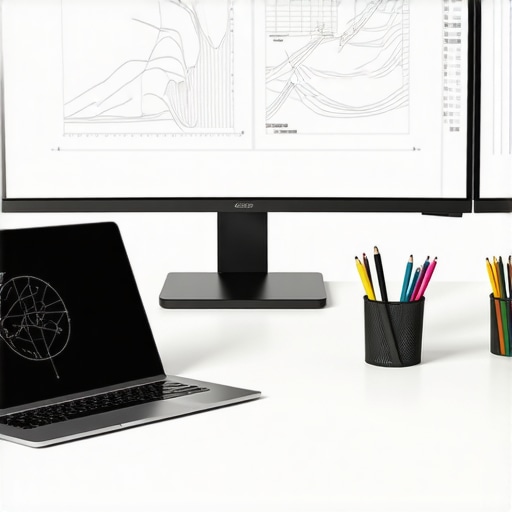
It hit me one afternoon when I caught myself squinting at my ultra-wide, heavily curved monitor, trying to make sense of a complex Photoshop composition. The screen’s intense curve felt almost like a wall blocking my view, and I wondered if I had gone too far with the 1000R design. That moment made me realize that the very feature touted as a game-changer might be turning into a headache for graphic designers like us.
When Curves Cross the Line from Immersive to Disruptive
As someone who loves pushing the boundaries of workspace setups, I was excited about the potential of ultra-curved displays. But early on, I made a mistake that many newcomers do: I thought more curve equated to better immersion. Turns out, the right curvature depends heavily on your specific use case—whether gaming, entertainment, or detailed design work. For graphic design, an overly aggressive curve like 1000R can sometimes cause distortion, making straight lines look warped and skewing visual precision.
Understanding this, I started examining how the curve affects my workflow. To my surprise, I found that a less aggressive curvature can provide the immersive benefits without compromising critical detail. I learned that choosing the right curve isn’t just about size or hype—it’s about what enhances your work, not hinders it.
Are you facing similar frustrations with your curved monitor setup? If so, you’re not alone. Many professionals have had to recalibrate their expectations and equipment to find harmony between immersion and precision.
Is the Extravagant Curve Actually Worth the Hype?
I confess, one of my first mistakes was investing in a 1000R model without ample research, simply because it looked impressive in the store. I assumed it would significantly boost productivity and comfort. But after some weeks, I realized that in certain tasks—like intricate graphic design—the curve can sometimes cause more harm than good. This aligns with findings from display experts, who note that excessively curved screens can distort visuals and impede fine detail work (see [this article](https://curvedtvs.ultimatehomedisplays.com/ultrawide-displays-and-their-impact-on-productivity-and-gaming)).
Thankfully, I discovered that adjusting the curvature to a milder angle, such as 1800R or 1500R, often strikes a better balance. The key takeaway? Bigger isn’t always better; optimal curvature depends on your workspace, sitting distance, and the type of work you do.
In the sections ahead, I’ll share practical tips and insights on selecting the right curve for graphic design, helping you avoid my initial pitfalls. Ready to transform your workspace into a truly efficient, visually accurate environment? Let’s get started.
Assess Your Workspace and Sitting Distance
Start by measuring the space where you’ll place your monitor. Sit at your typical working distance—usually 20 to 30 inches from your screen—and evaluate how you perceive the monitor’s curvature. In my own setup, I initially placed a 1000R curved monitor too close, which caused distortion and eye strain. To avoid this, I adjusted my seating position to see if the curve felt natural, not overly aggressive. Think of it like sitting in a theater: the closer you sit, the more the screen’s curvature impacts your viewing experience. For desktops, a curvature around 1800R or 1500R often provides a comfortable immersive feel without distorting straight lines.
Match the Curve to Your Use Case
Identify your primary use—whether it’s graphic design, gaming, or general productivity. For detailed work like Photoshop, a milder curve reduces visual distortion. For example, I switched from a 1000R to a 1800R monitor while editing images; the gentler curve maintained immersion without warping straight edges. Use this comparison guide to understand how different curves affect various activities. Essentially, the goal is to enhance focus without compromising precision—select a curvature that complements your tasks.
Test Different Curves Before Committing
If possible, try out monitors with various curves. Visit stores or borrow from friends to see how each feels. I once spent an afternoon testing multiple models, from 1000R to 1500R, on different desks. The experience highlighted how a slightly milder curve preserved the immersive aspect for gaming and video editing while keeping straight lines true for design work. Remember, what looks good in a showroom can feel different in your environment. For more insights, see this guide to ultrawide benefits.
Adjust Your Monitor Position
Set the monitor’s height and angle so that the top of the screen is level with your eyes. This ensures minimal neck movement and reduces eye strain, especially on highly curved models. Once I adjusted my monitor, I noticed a drastic reduction in fatigue during long editing sessions. Using adjustable mounts or stands can help fine-tune this setup. Think of your monitor as a window: the optimal position makes the view clear and comfortable. For mounting solutions, explore mounting options.
Iterate and Fine-Tune
Don’t settle on the first setting. Small adjustments—moving the monitor closer or farther, tilting slightly—can significantly improve comfort. During my experience, I experimented over several days, gradually dialing in the perfect setup. Keep notes on what works best. Remember, ergonomic comfort directly influences your visual performance. For additional ergonomic tips, see this ergonomic guide. Ultimately, your goal is a setup that supports your workflow without causing eye strain or distortion, ensuring that your curved monitor enhances productivity rather than hinders it.While many see ultrawide monitors and curved screens as straightforward upgrades, there’s a hidden nuance that often trips up even seasoned users. A prevalent misconception is that bigger or more pronounced curves always deliver better immersion—that’s not entirely true. In fact, overly aggressive curves, like 1000R models, can distort straight lines and lead to visual artifacts, especially in design tasks. This isn’t just a matter of aesthetics but affects your workflow and eye comfort. Studies from vision experts highlight that display curvature impacts how our eyes perceive depth and straight lines, so choosing the right curvature is critical at an advanced level. Don’t fall into the trap of assuming more curvature equals better experience; instead, assess your sitting distance and primary tasks to determine optimal curvature. Remember, a well-calibrated ultrawide or curved screen can elevate productivity and reduce eye strain, but a poor choice can have the opposite effect. If you’re considering this upgrade, explore this guide to match your needs precisely. Have you ever fallen into this trap? Let me know in the comments.Maintaining your immersive screen setup requires a mix of the right tools, regular routines, and a proactive mindset. To ensure your ultrawide monitor or curved TV delivers consistent performance, I rely on specific equipment like a microfiber cleaning cloth designed for delicate coatings and screen-specific cleaning solutions such as Whoosh! Screen Cleaner, which I personally use for its streak-free finish and gentle formula. Regularly, I dust my display with compressed air, especially around vents or mounted areas, to prevent dust buildup that can cause overheating or glare issues. Using the correct tools ensures that your display remains clear and vibrant, preserving the quality that makes your work and entertainment so immersive. Additionally, keeping firmware up-to-date through manufacturer software safeguards your monitor against bugs and compatibility issues. I also utilize calibration tools like the Datacolor SpyderX to fine-tune color accuracy periodically, which is crucial for graphic design and photography workflows. Looking ahead, as display technology advances, I predict a shift toward integrated maintenance modules that automatically self-clean or optimize performance, reducing manual effort significantly.
The Surprising Truth About Curves and Clarity
One of the most eye-opening lessons I learned is that not all curves are created equal—sometimes, pushing for a bigger or more aggressive curve can actually harm your workflow, especially when fine detail matters. I once believed that a 1000R curve would maximize immersion, but it often caused distortion during precise tasks like photo editing, revealing that moderation can be a powerful tool for screen setup success.
Adjustments Make All the Difference
Before settling on a specific curvature, I discovered that small tweaks—changing sitting distance, monitor tilt, or height—could make my viewing experience more comfortable and accurate. These subtle changes helped me harness the benefits of an immersive display without sacrificing work precision, reminding me that customization is key to a productive setup.
Curated Tools That Transformed My Experience
Using calibration tools like the Datacolor SpyderX elevated my display’s color accuracy, which is crucial for detailed design work. Regular maintenance tools like microfiber cloths and screen cleaners, combined with firmware updates, kept my monitor in top shape, ensuring that I get the most immersive and accurate visuals. For deeper insights, I recommend exploring trusted resources such as this comprehensive guide.
Your Next Step: Embrace the Full Potential of Curved Displays
Don’t let initial setbacks discourage you from optimizing your ultrawide or curved monitor setup. Experiment, adjust, and stay curious—because the right configuration can elevate your work, gaming, and entertainment experiences into truly immersive realms. Remember, your perfect setup isn’t a one-size-fits-all; it’s a personalized journey worth taking.
What challenges have you faced when customizing your ultrawide or curved display? Share your experiences below and join the community of enthusiasts seeking the ultimate immersive screen!